This pages assumes that you have already created your accessibility statement using our Accessibility Statement Generator tool.
If you have any problems then please don't hesitate to contact us.
Copying the Statement to Your Website
This section will show you how to add the code from the Accessibility Statement Generator to WordPress Block Editor, WordPress Classic Editor and other websites.
WordPress Block Editor
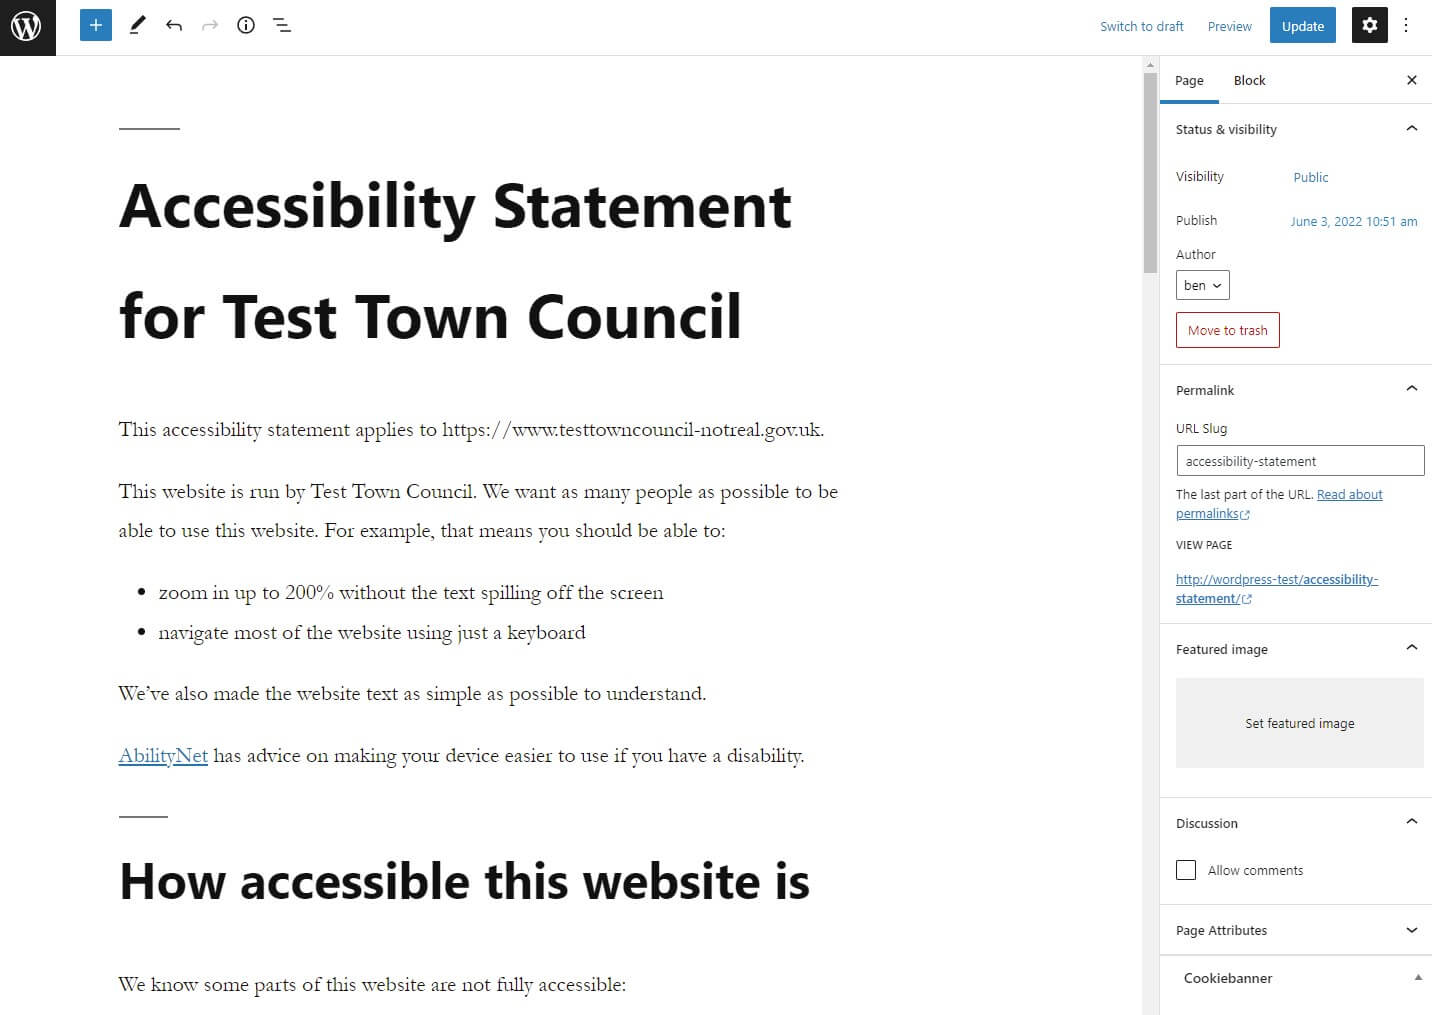
These instructions and screenshot are for WordPress version 6.0 and may vary slightly if you have a different version.
When you create a new page, if you have Block Editor then there will be a heading at the top named Auto Draft and text below it saying "Type / to chose a block". Run through the following:
- Change the title from Auto Draft to Accessibility Statement for Your Town Council.
- Next to "Type / to chose a block", select the plus (+) button.
- Search for HTML and select the Custom HTML option.
- You should now have a box that says "Write HTML ...". Paste the code from the Accessibility Statement Generator into here.
- Select Options (three dots on top of each other above the box) and then select "Convert to Blocks".
- If the process is successful then you shouldn't be able to see any tags such as <h2> and <p> and you should see headings of different sizes.
- Next locate the panel with Page and Block tabs. If it's not showing then activate the settings cog at the top of the page.
- Select the Page tab and shorten the URL Slug to accessibility-statement
- Save Draft and then Preview the page using the buttons at the top of the page.
Now you need to complete the accessibility statement.
WordPress Classic Editor
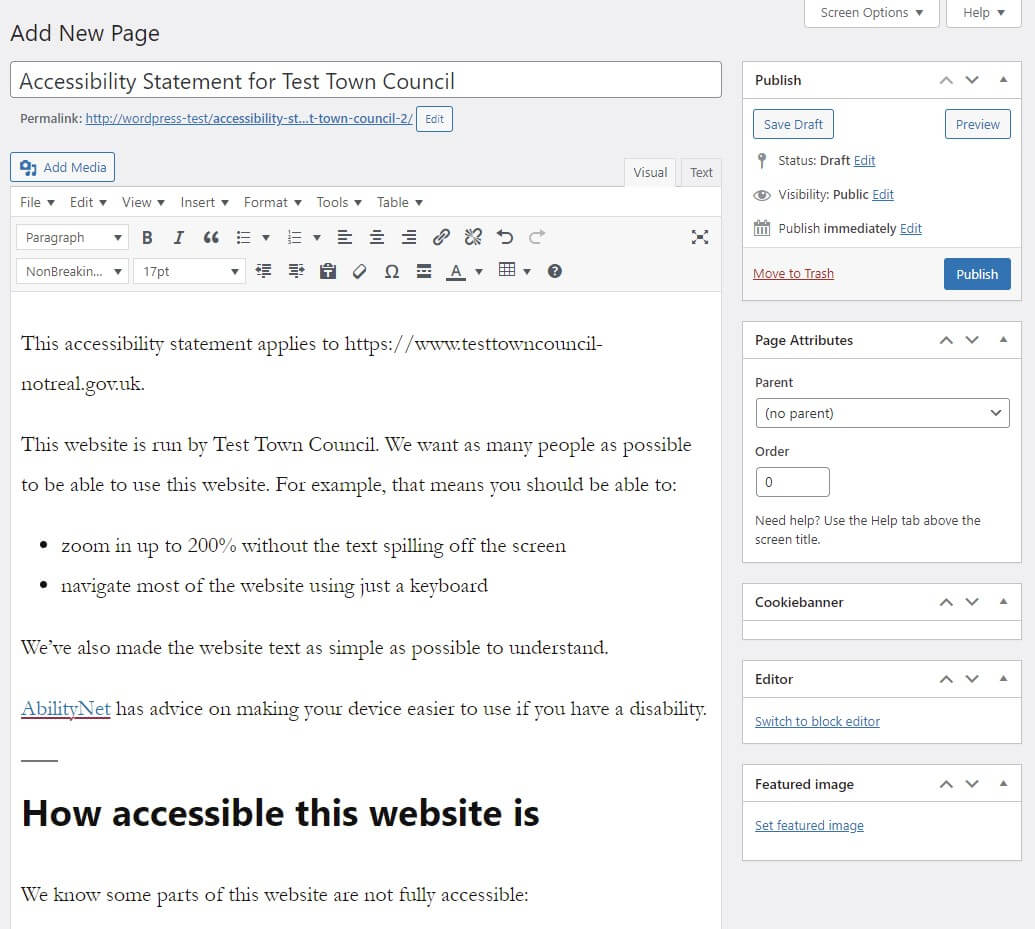
These instructions and screenshot are for WordPress version 6.0 and may vary slightly if you have a different version.
If you have Classic Editor then Add New Page will appear at the top followed by a box with the words "Add title" and a single larger box to add and edit text. The large box should have Visual and Text tabs. Run through the following:
- Add Accessibility Statement for Your Town Council to the Add title box.
- Press enter and the Permalink should appear under the title. Shorten the Permalink to accessibility-statement using the Edit button.
- In the main text box, make sure the Text tab is selected, and paste the code from the Accessibility Statement Generator.
- Select the Visual tab and the text should be formatted with headings of different sizes.
- Save Draft and then Preview the page using the buttons in the Publish section at the top of the page.
Now you need to complete the accessibility statement.
Other Websites
If you have WordPress that doesn't use the Block Editor or Classic Editor, or if you have any other type of website, then you'll need to find the best way to add HTML code to the page. Run through the following:
- Create a page as you would normally.
- Set the title to Accessibility Statement for Your Town Council.
- For the main body of text, look for buttons labelled Code or Source. Paste the code into the appropriate place.
- If possible, make sure the address of the webpage ends in accessibility-statement e.g. https://www.yourtowncouncil.gov.uk/accessibility-statement
- Save the page as a draft if possible and preview the page.
- You should see headings of different sizes and you shouldn't be able to see any tags such as <p>. If things don't look right then you may need to paste the code in a different way. Please feel free to contact us for advice if needed.
Now you need to complete the accessibility statement.
Completing the Accessibility Statement
To complete the statement, run through the following:
- View the page and make sure that you don't see any tags such as <h2> or <p> on the page. You should see headings of different sizes on the page.
- Edit the page and go down to the Non-accessible content section. Within this, you should see three sections Non-compliance with the accessibility regulations, Disproportionate burden and Content that’s not within the scope of the accessibility regulations.
- Review each of these sections. Any problems you entered into the Accessibility Statement Generator will appear as a heading here. Add additional information about each problem here, including an explanation of the problem, any workarounds and timescales for any fixes.
- Read through the whole accessibility statement from top to bottom and make sure all the information is correct. Refer to the Government's Sample Accessibility Statement for information on what must be included and the legal wording.
- Publish the accessibility statement.
- Add a link to the accessibility statement at the top of the website's footer, so that it's easy to find.
If you have any problems or need any advice then please don't hesitate to contact us.
Additional Notes
- Some of the wording of the accessibility statement is legally required, so refer to the Government's Sample Accessibility Statement before making any changes.
- If the accessibility statement is for a mobile application rather than a website, change the wording in the statement to reflect this.
- The statement will list that the website as partially compliant with the regulations. Please refer to the Compliance status section of the Government's Sample Accessibility Statement for information on compliance levels and update the statement if appropriate.
- If the public sector body is based in Northern Ireland then change the Enforcement procedure section - see the Government's Sample Accessibility Statement for details.
- If this statement covers more than one domain then update the text accordingly - see the Government's Sample Accessibility Statement for details.
- The heading levels set on the template should work for most websites but may need to be adjusted for some sites. Please contact us for advice if needed.
- If you need more details then you can refer to the Public Sector Bodies (Websites and Mobile Applications) (No. 2) Accessibility Regulations 2018.
Add a new comment